Tuesday, December 19, 2017

Home Made Butter Using A Stand Mixer

This is so easy you won't even believe it yourself until you do it.  Butter is a bit costly, especially if you purchase brands that are imported like I do.  I love Kerry Gold and they are a wonderful company. I had called them and told them I love their cheeses and butter but it's a bit pricey here. They took my address and sent me coupons, I was very impressed.

Sometimes at the holidays I'll make flavored butters and leave them on the buffet table or give them to friends and family, along with a large mixed cookie tin and quick breads.  I have also given a basket made up of my home made Bread and Butter Pickles and Jams.  Honestly, I had more people request I keep doing this than purchasing gifts for them.

This recipe will make 1-Pound of fresh butter and about 4-Cups fresh buttermilk

What You Will Need:
Stand Mixer with both Paddle and Whisk attachments *A hand mixer should work too*
Plastic Wrap or Wax Paper
Spatula
Measuring Cups and Spoons
Colander or Strainer
Clean Sterilized Mason Jar With Lid
Funnel
Bread Baking Pan or Butter Molds *Optional*

Ingredients:
1-Quart Heavy Cream *Cold*  (6-Cups)
3/4-Teaspoon Sea Salt finely ground *Optional*
Large Bowl Of Ice Water For Rinsing


**This gets a little bit messy so if you have the splash-guard attachment I would use it, I don't so I just cover the bowl with plastic wrap when the beaters are spinning.**

Add the cold heavy cream to your stand mixer bowl, using the paddle attachment.  Set the stand mixer to low to start, then turn up to medium speed for about 3-minutes. The heavy cream will first turn into whipped cream with soft peaks, as you continue to beat, the peaks will become stiffer.


Once the peeks become stiff, shut the mixer off and switch to the whisk attachment set to low and whisk for 1-minute. After the 1-minute, turn on high and keep beating until the cream breaks and you start to see butter forming on the sides of your mixing bowl.  The butter will then start to stick to the whisk in about 5-10 minutes or so.  You want to separate the butter fat from the liquid which is the buttermilk.


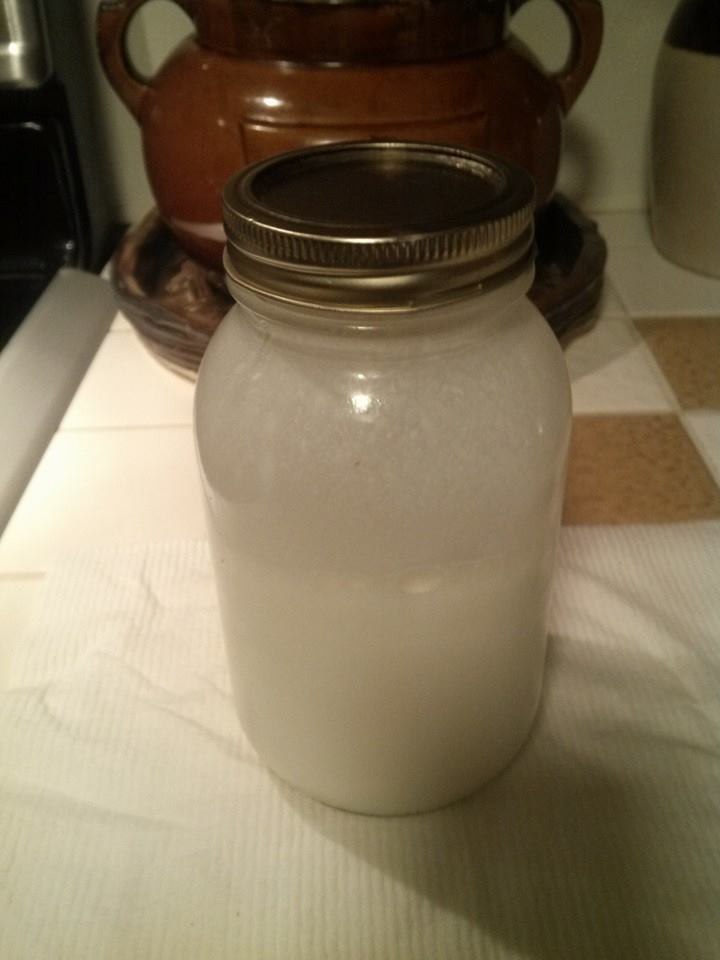
Once the cream has completely turned solid, pour the buttermilk out of the mixing bowl using your funnel and transferring it into the mason jar.  Put the lid on tightly and store in the refrigerator.  Some people love it, I actually hate the taste, but when added in to baking and cooking it's very good.


Place the colander or strainer into your kitchen sink and scoop out the butter from the mixing bowl either with your hands or the spatula and place into strainer or colander. Rinse the butter by pouring the ice water over it and pressing the butter into the colander or strainer using your spatula or both of your hands, this will express any left over buttermilk liquid.  Repeat this process until the water runs clear off of the butter.


Once the butter runs clear, scoop the butter out of the colander and place back into the stand mixer's mixing bowl.  Add the salt if you choose to, work the salt thoroughly through the butter using the whisk attachment on low or use both of your hands. Once thoroughly mixed you can mold the butter into the bread pan or mold into sticks like I have done here. If you have decorative butter molds you
can use them. Hint....hint... I wouldn't mind Santa bringing me a couple for Christmas. 😉 Once you do the molding or shaping you can wrap the butter up in either wax paper or plastic wrap and store in the refrigerator. The last photo is Honey Butter, to make just add 1/4-Cup of pure honey and mix with the butter when you're adding in the salt, then shape.


Print Friendly and PDF

Monday, December 18, 2017

Skillet Pumpkin Cornbread

            This pairs well with the Chili Con Carne recipe I had posted.

What you will need:
Cast Iron Skillet Frying Pan
Whisk, Hand Mixer or Stand Mixer *Which ever you have, I used my stand mixer*
Spatula 
Measuring Cups and Spoons
2-Large Mixing Bowls
Pastry Brush
Tooth Picks
large sifter
Oven Mitts

Ingredients:
2-Cups Pumpkin Puree *I used my own that I had processed. I have instructions on here if you'd like to also do your own, if not, then canned store bought is fine.*
1-Cup Whole Milk
1/2-Cup Honey
1/4-Cup Butter Melted, plus 1-Tablespoon Solid
1-Teaspoon Salt
1-Teaspoon Baking Powder
1/2-Teaspoon Baking Soda *Bicarbonate*
1 1/2-Cups Cornmeal Stone Ground Yellow
1-Cup Unbleached All Purpose Flour *White is fine*
2-Large Eggs
2-Teaspoons Pumpkin Pie Spice. *I make my own, instructions are below*

**If you don't have Pumpkin Pie Spice in your house you can make your own by using 3-Tablespoons Ground Cinnamon, 2-Teaspoons Ground Ginger, 2-Teaspoons Ground Nutmeg, 1 1/2-Teaspoons Ground Allspice and 1 1/2-Teaspoons Ground Cloves. Mix well and put in an air tight container. Take the 2-Teaspoons out of this mixture.**  


Put your cast iron skillet into your oven and preheat to 400-degrees Fahrenheit 


In your large bowl or using a stand mixer using the paddle attachment, lift the stand mixer head up  adding the eggs, pumpkin puree, milk, honey, and 1/4-Cup melted butter to the mixing bowl.  Drop the head down and lock. Mix on medium speed until well blended. 


Take your second bowl and place the sifter over top.  Add the dry ingredients into the sifter.  Flour, cornmeal, baking soda, baking powder, salt, and pumpkin pie spice. Gently shake the sifter up and down over top of the bowl, this will incorporate all the ingredients making sure there is no clumping.  Remove sifter and set aside.  


Unlock and lift the stand mixer head up and add a little bit of the dry mixture to the wet.  Put the mixer head down and lock, turn on low speed and mix until well blended. Stop the mixer, lift up and add a little more dry mixture, repeat this process until all of the dry mix is combined with the wet.  *I just added these steps for the mixer because some people have never used one before.*


Put on your oven mitts and remove the cast iron skillet, place on a heat resistant surface.  Be careful this is extremely hot, I can't express this enough!!  Put the slice of butter into the skillet and brush the sides and bottom with your pastry brush.  Remove mitts.  Add the batter into the skillet, you can scrape the extra out with your spatula.  Spread batter evenly in skillet.  


Put your oven mitts back on because this skillet is still screaming hot, place back into the oven. Bake for 35-45 minutes.  When time is up, place oven mitts back on.  Take skillet out of the oven and place on a heat resistant surface.  Taking your tooth pick, insert into the middle of the cornbread and push half-way down and then remove it.  If the tooth pick comes out clean then it's done, if there is batter on the tooth pick, place the skillet back into the oven again for a few more minutes and check again using my precautionary measures so you don't get badly burned.  


If the cornbread is done baking, keep on a heat resistant surface and let cool for at least 20-minutes before serving. Cut into equal size triangles.  Serving suggestions:  Add a little knob of butter to the top and drizzle with either honey or all natural maple syrup.  I heat it up in the morning and have it for breakfast with a cup of tea or coffee.  


Print Friendly and PDF


Chili Con Carne In The Crock Pot - Slow Cooker

Here's another hearty stick-to-your ribs meal for a cold winter's night.  I serve it with either my home made Jalapeno Corn Bread which I have that recipe listed here, or my Pumpkin Corn Bread which I'll be posting as time permits, both are delicious and easy as sin to make.  I try to do canning-processing of my own tomatoes, this year I wasn't able to, so store bought will do just fine.

This is mildly spicy with a small kick to it, if you like your chili more spicy, increase the Chili Powder, Cayenne and add 1/2-Teaspoon Red Pepper Flakes. You can also add in a small Jalapeno Pepper, diced and seeded, leave the seeds if you want it even hotter.  My son's taste buds are more sadistic than mine are, he likes it hot, the hotter the better. He adds Hot Sauce to everything, me.... I prefer finishing my meal with my lips and tongue still in tact and not sweating profusely seeing my life flash before my eyes.  LOL!  *If you find this is still too spicy for you, stir in a tablespoon or so of sour cream, it will cut the heat.*


What You Will Need:
Slow Cooker - Crock Pot
Measuring Cup and Spoons
Sharp Knife
Can Opener *Electric or hand*
Non-Stick Skillet (Frying Pan) or whatever you have
Tasting Spoon
Wooden Spoon

Ingredients:
2-Pounds Ground Beef 85% Lean
2-28 Ounce Cans Crushed Chunky Tomatoes, cut up.
1-14.5 Ounce Can Diced Tomatoes
2-Medium Yellow Onions, Peeled and Chopped
1-Green Pepper, Seeded and Diced
1-Orange Pepper, Seeded and Diced
1-15.5 Ounce Can Red Kidney Beans, Drained
1-15.5 Ounce Can White Cannellini Beans, Drained
2-Tablespoons Unbleached Sugar *White is fine if you don't have it*
3-Teaspoons Sea Salt, ground.  *Regular table salt is fine if you don't have it*
2-Teaspoons Ground Black Pepper
2-Tablespoons Smoked Paprika
2-Tablespoons Granulated Garlic
2-Tablespoons Chili Powder
2-Tablespoons Tomato Paste
1 1/2-Teaspoons Ground Cumin
1/8-Teaspoon Cayenne Pepper
Shredded Cheese, chopped chives or Sour Cream to top *Optional*


Set your stove top for medium heat, saute the onions, green and orange peppers until the onions are translucent, then put them into your slow cooker.


Now in the same frying pan, brown your ground beef adding the salt, black pepper, cumin, tomato paste and granulated garlic, mix well breaking up the ground beef into minced pieces with your wooden spoon, once browned, put into the crock pot. There shouldn't be much fat from the ground beef due to the lean percentage. I don't drain it off because it gives more flavor.


Add the remaining ingredients into the crock pot. give a couple of stirs with the wooden spoon. Cook in Crock Pot - Slow Cooker covered for 5-6 hours set the temperature on low. In about 2-hours use your tasting spoon to see if you need more spices, if not, just leave it alone until it finishes cooking.


I put out in small serving bowls, sour cream, shredded cheese, chopped chives, chopped jalapeno pepper and hot sauce for topping.  You can also serve this over rice if you like, I serve it both ways.


Print Friendly and PDF

Saturday, December 16, 2017

Yankee Pot Roast

Yankee actually refers to those of us that live in the 6-original New England colonies in the North East, it's the oldest settled parts of my country. We have lower populations and so much rural charm, although we do have larger cities as well.  The 6-colonies would be: Connecticut where I am from, Maine, Massachusetts, New Hampshire, Rhode Island and Vermont. We are steeped in rich history and beautiful old homes and farms.  I have many friends from the UK, Ireland and other countries that are always calling me a Yankee, which they call all Americans.  So I guess you could say I am a Yankee girl through and through.  Both American and a New Englander. 💖

This is an old recipe and so easy to make, it's great on cold winter days because it's hearty and delicious.  I make this often with Garlic Mashed Potatoes and home made Drop Biscuits.

What you will need:
Crock Pot - Slow Cooker
Measuring Cup and Spoons
Skillet **I used a non-stick one this time**
Large Roasting Pan With Lid
2-Large Bowls
Large Plate
Sharp Knife
Wooden Spoon
Serving Platter
Paper Towels or Linen Kitchen Towel
Whisk or Immersion Blender
Oven Mitts
Fork
Large Strainer or Colander


Ingredients:
4-Medium Carrots, peeled and cut into 2-inch pieces
3-Celery Stalks, cut into 2-inch pieces
10-Ounce Package of White Mushrooms, washed and sliced
1-Large Yellow Sweet Onion, peeled and sliced into rings and then halved
1-Tablespoons Dried Parsley
1-Tablespoons Dried Thyme
3-Dried Bay Leaves
1/2 Teaspoon Ground Allspice
2-Tablespoons Granulated Garlic
2 1/2-Teaspoons Sea Salt **I grind mine**
1 1/2-Teaspoons Multi-Colored Whole Peppercorns **I grind mine, you can use Ground Black Pepper if you like**
3-Cups of Red Wine **Use whatever you have available, it's only going to burn off the alcohol**
3-Tablespoons Of Tomato Paste
3-Tablespoons Extra Virgin Olive Oil
1/3-Cup White All Purpose Flour, plus a bit more for coating the meat
3-Cups Low-Sodium Beef Broth
4-5 Pound Beef Chuck Roast
2-Teaspoons Dried Rosemary


Directions:
Pre-heat your oven to 350-Degrees Fahrenheit

Put the flour, salt and pepper into the large bowl, mix together.  Now pat the roast dry with either the paper towel or linen kitchen towel. Add the roast to the bowl and coat with the flour mixture.  Shake off any excess flour.


Place your skillet onto your stove top and set the temperature to medium-high heat.  Add 2-Tablespoons of Extra Virgin Olive Oil. Let the oil warm up just for a few minutes and then add the flour coated roast to the skillet. You want to brown each side of the roast for about 8-10 minutes each side or until golden brown.  When browned, remove the roast from the skillet and place on to the large plate and set aside.


Re-set the stove top burner to medium heat, add the rest of the Extra Virgin Olive Oil to the skillet along with the tomato paste. Stir with the wooden spoon until the paste turns to a deep dark red color, approximately a minute or two. Once the paste turns to a dark red you can add the 1/3-Cup of All Purpose White Flour and the red wine, whisk until it becomes thick. If you have some small lumps that's okay, they will eventually smooth out when cooking later on.  Now place the gravy into the roasting pan over the stove top. Add the beef broth, thyme, allspice, rosemary and 1/2 teaspoon of salt and a few grinds of pepper and bring to a simmer, continue whisking or using the immersion blender until the gravy is smooth and shiny and begins to thicken, this should take about 5-minutes or so, give or take. Make sure all of the flour lumps have been dissolved.


Add the the mushrooms, celery, carrots, bay leaves and garlic to the roasting pan.  Place the roast on top of the vegetables.  Cover the roasting pan and place it in the oven while wearing oven mitts.  Roast for about 4-hours until the vegetables are tender and the meat is tender and falling apart when you check it with a fork.


When the roast is completely cooked through, remove from the oven and place on a heat resistant surface.  Using a colander or strainer, strain the vegetables over a large bowl and keeping the gravy.  Remove the 3-bay leaves and throw away.  Place the roast onto a large serving platter and let rest for about 10-minutes. When serving the roast, cut against the grain. Once sliced-carved, add the strained vegetables to the platter, I usually put them all away around the platter.  Take the gravy that was strained into the bowl and put into a gravy boat. Serve the gravy over the roast, vegetables and garlic mashed potatoes or on the side, which ever way you prefer.


Print Friendly and PDF

Cottage Pie

I'm always getting asked "What's the difference between Shepard's Pie and Cottage Pie?" It's the meat, in Cottage you use ground beef and in Shepard's you use ground or small chunks of lamb. How to remember....the Shepard's herd sheep not cows.  😉

This is a hearty and complete supper - dinner and it's fairly quick and easy to make.  It's delicious especially when served with a thick slice of home made Brown Soda Bread and a knob of butter. **I have the Traditional Irish Soda Bread recipe listed on here.** Sometimes I add sliced mushrooms and mash parsnips into the potatoes, and instead of sliced onions I'll use Pearl, this time I didn't do any of that, but you can and it's just as delicious.  I usually make this during the fall and winter months, my family loves it.  This one I had made and  brought over to my oldest daughter's house for her and the grand kids due to her working late at her hair salon on Friday evenings.  I like to help her out a little bit when I can, it's nice to sit down and share a meal with her and the kids.

I used dry herbs due to it being late in the year, you can use fresh if you like.  I do when I can find them. All of my name-brand food items are a suggestion because I like them, if you don't have them just use your own brands.

What You Will Need:
Heavy Skillet **I used my non-stick one this time**
Measuring Cups and Spoons
Grater hand or boxed
1-Large Pot
1-Medium Pot
1-Large Casserole Dish
1-Small Bowl
1-Large Spoon or Spatula
Oven Mitts
Colander
Hand Mixer or Potato Masher
Large Wooden Spoon for stirring
Whisk
Tasting Spoon

**Pre-heat your oven to 375-Degrees Fahrenheit**

Ingredients:
2-3 Pounds Lean Ground Beef
3-Carrots, peeled, cut into coins
2-Cups of frozen Peas thawed **or Fresh if you have them**
4-Medium Yukon Gold Potatoes, washed, peeled and cut into quarters
1-Stick of Butter sliced **I like Kerry Gold if I didn't make my own**
1-Tablespoon Extra Virgin Olive Oil
1-Large Onion, peeled and sliced
1/3-Cup of All Purpose White Flour
1/2-Teaspoon Course Sea Salt **I grind mine, you can use regular Salt**
1/2-Teaspoon Ground Black Pepper
2-Teaspoons Dried Rosemary
1-Teaspoon Thyme
1-Teaspoon Ground Smoked Paprika
1/2-Teaspoon Ground Cinnamon
3-Tablespoons of Tomato Ketchup
3-Garlic Cloves, peeled and minced
1/2-Cup of Cream Cheese
1-7-ounce block of Kerry Gold Dubliner Cheese, Shredded **I freeze mine so it's easier to shred**
1-Egg Yolk
1-Cup Whole Milk Plus 2-Tablespoons
2-Cups Beef Stock
2-Teaspoons Dry Parsley
Water for boiling potatoes, peas and carrots


Directions:
Add water to your medium and large pots.  Put the carrots and peas into the medium one and the potatoes into the large.  Add a pinch of salt to each and boil until carrots and potatoes are fork tender.


While your vegetables are cooking, place your skillet onto the stove top, set the temperature to medium heat.  Add in the Extra Virgin Olive Oil and 2-Tablespoons of butter, stir in the onions and cook until translucent, then add in the ground beef. While the beef is cooking, break the meat up into little chunks-crumbles using your wooden spoon. Cook until the meat is browned for about 10-minutes or so.

Add the flour to the meat and onions, stir until blended, then add salt, pepper, rosemary, paprika, cinnamon, ketchup, garlic, and thyme.  Cook and stir all ingredients for about 5-minutes. Add in the beef stock, scrape up the brown bits that are at the bottom of the skillet and continue to stir. Reduce the heat to medium-low, bring to a slow simmer, keep stirring until nice and thick, usually about another 5-minutes.


Remove the skillet from the stove top and place on a heat resistant surface or another burner that is cooled.  Add the meat mixture into your casserole dish and set aside.  Drain the peas and carrots separately from the potatoes once fork tender.  Add the peas and carrots to the meat mixture, spread on top until completely covered you want to layer this dish.  Now set aside.


Take the well drained potatoes and place them back into the pot you were using, add in the cream cheese, the remaining butter, 3/4's of the grated Dubliner Cheese, salt, pepper, and milk. Whip everything with a hand mixer or use a hand potato masher until lumps are gone and potatoes are smooth and then set aside.

In the small bowl, whisk the egg yolk and the 2-Tablespoons of milk, add to the mashed potatoes and mix well.  **You can add less or more milk, salt and pepper, it's to your own taste. Taste first because you can always add, you can't remove once it's been added. ** I normally whip the potatoes adding in the milk a little at a time until I get the consistency I am looking for. Some people like a more lumpy stiff mashed potato, I don't. Add the potatoes on top of the beef mixture, spread until the meat mixture is completely covered.  Sprinkle the rest of the shredded cheese, parsley and paprika over top of the potatoes.


Place the casserole dish into the pre-heated oven and bake for 30-minutes or so, or until the top is golden brown and the sauce is bubbling up around the edges.

Put on your oven mitts and remove the casserole dish from the oven, place onto a heat resistant surface or place onto pot holders or a towel, etc.,..  Let stand for about 10-minutes so it can all set up, it is very hot so be careful.  Serve and eat.


Print Friendly and PDF


Honey Apple Pork Loin Done In A Crock Pot (Slow Cooker)

This is so easy and delicious at the same time. I like making this during the holidays because on Sundays I'm usually busy making cookies, desserts, breads, butter and decorating the house.  I hope you like it. I made enough to feed 8-people, you can half it or freeze the left-overs in a freezer proof zip lock bag.  I usually don't have left overs.


What you Will Need:
6-Quart Crock Pot - Slow Cooker or Larger
Measuring Cup and Spoons
Sharp Knife
Apple Corer With Slicer
Paper Towels or Linen Kitchen Towel
Plate
Serving Platter

Ingredients:
2-24 Ounce Pork Loins
4-Granny Smith Apples or McIntosh, Sliced, Cored and Divided
2-Large Yellow Sweet Onions, Peeled and Sliced **Or whatever onions you like, I find these work best.**
1-Stick Of Butter Sliced
1/2-Teaspoon Salt **I used whole Pink Himalayan I grind it myself. You can use whatever you like.**
1/2-Teaspoon Colored Peppercorns.  **I grind my own, you can use regular Black Pepper**
1-Teaspoon Ground Cinnamon
1/2-Cup Pure Honey
1/2-Teaspoon Fresh or Dried Thyme. If fresh use a few sprigs.**I used Dry this time.**
**You can adjust the herbs and spices to your own personal taste**

Directions:
Place your Crock Pot - Slow Cooker on a flat surface, set to low, the cooking time will be 6-7 hours depending on your Cooker. If you want it done faster, then set to high, the cooking time will be about 3-4 hours.


Pat the 2-Pork Loins dry with either the linen towel or paper towels. Using your sharp knife
cut 1-inch slits across the meat.  Take your apple slices and insert them into the slits and set aside on the plate.


Add the remaining apples into the Crock Pot along with the onions, add the sliced butter pieces on top.


Add in the 2-Pork Loins, laying on top of the mixture.
Sprinkle spices and herbs on top of the Pork Loin.
Drizzle everything with the honey.


Cover the Crock Pot - Slow Cooker  and just let it do its thing.   When the time is up, whichever one you choose, remove the pork loin and place it on a serving platter to rest for at least 5-minutes.  Slice and serve.  I'm sorry I don't have a photos of the finished product, I had a house full of people and by the time I remembered to take photos, we already ate it. LOL! You can serve this on Christmas Eve as part of the Buffet.  You can eat it alone or on a Crusty Bread Roll with my Honey Mustard Glaze which I have already posted on here.  Enjoy!


Print Friendly and PDF