Tuesday, February 9, 2016

Irish Beef and Barley Stew

I love being as close to my Irish roots as possible and finding old tried and true recipes. With this stew you can substitute the beef for lamb.  I myself switch it up now and again by doing 50/50, half lamb and half beef. This stew makes a really nice rich gravy on its own without adding flour.  You can serve it immediately after it's done cooking or store it in your refrigerator in an air tight container and or have it the next or following days.  I like to serve this with a nice warm slice of my Irish Brown Soda bread with a little butter. This is a delicious and filling meal any time of the year, although I tend to make it more in the cooler - colder months.  


What you will need: 
Cast Iron Skillet or Frying Pan
Heavy Pot with a lid *A Dutch Oven works great*
Sharp Knife
Measuring Spoons
Measuring Cup
1-Large Plate
1-Wooden Spoon 
2-Pot holders or oven mitts
1-Tasting Spoon - teaspoon

Ingredients: 
4-Large Carrots, tops and bottoms removed.  I don't peel them but you can.  You can quarter them I like bite size chunks 2 1/2-inch round pieces. 
4-Large Potatoes washed, peeled and cubed. Russets work well. *Bite size chunks*
2-Large Yellow Onions, peeled and rough chopped, diced
2-Pounds Stew Beef cut in to smaller bite size chunks, 1 1/2-inch
3-Garlic Cloves peeled and grated or finely chopped
6-Cups of Beef Stock * No or low sodium*
1 1/2-Teaspoon Salt  
1-Teaspoon Cracked Black Pepper 
1-Cup Barley Pearls
2 1/2-Tablespoons Vegetable Oil
2-Dried Bay Leaves
1-Tablespoon Dry Thyme
1-Tablespoon Dark or Light Brown Sugar, I like dark
2 1/2 Tablespoons Worcestershire Sauce
1-12-Ounce Bottle of Guinness
1-Cup water *Optional, may not be needed*


Salt and pepper your meat.  Place your heavy pot, dutch oven or skillet on your stove top, set on medium-high, add in the oil.  Place the meat into the skillet and brown giving the meat a nice sear. Once browned, remove from the skillet placing it onto a plate and set aside. 


Now add the onions to the remaining juices in the skillet, you want them caramelized, light brown color and tender.  Cook for about 8-minutes, stir so they are evenly cooked.  You can add a small splash of Guinness into your pan this will help lift and loosen the bits, it's called de-glazing. Give a couple of stirs with your wooden spoon.  


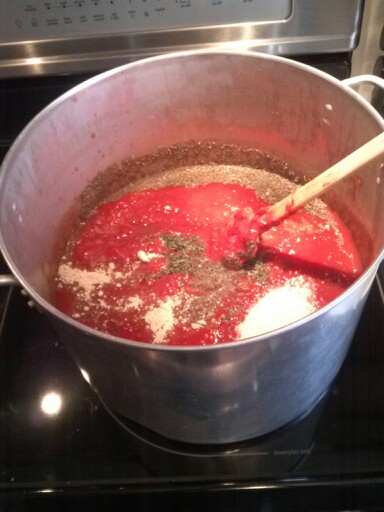
Add the rest of your ingredients into the skillet including your beef and Guinness, combine well stirring with the wooden spoon.  Bring the mixture to a boil, then reduce the temperature to a simmer.  **If you used a skillet, transfer all of the ingredients to the pot, be careful it's heavy and hot.  Use pot holders or oven mitts, especially when handling cast iron.**


Cover your pot or Dutch oven and simmer for about 2-hours or until the barley and vegetables are thoroughly cooked and tender.  Stir the stew a few times while simmering making sure everything is well mixed. If the stew appears to be dry or too thick you can stir in a cup of water.  At the end of the cooking time, take your tasting spoon and see if the stew needs any more salt or other seasonings, the barley tends to suck up flavors.  Remove and discard any of the bay leaves that may end up in your bowl.  Serve hot eat and enjoy!


Print Friendly and PDF


Monday, February 8, 2016

Meatball Grinders

We call them Grinders, Hoagies, Subs, Submarine Sandwiches, etc., depending on what area of my country you reside at.  Basically all they are is a meat filled sandwich with vegetables, such as, lettuce, tomatoes, pickles, olives, peppers, etc.., which can be mixed and matched or even optional. Most of the time they are heated in an oven to toast the bread aka: Grinder Roll.  The options are endless at how you would go about making them and most are a personal choice.  They are quick, easy and filling, as well as nutritious, depending on the toppings and meats you choose.


What you will need:
1-Large Baking Sheet lined with Aluminum Foil or Parchment Paper
1-Ladle
1-Sharp Knife
Plates to serve

**Makes 4-Grinders**

Ingredients:
20-Home made meatballs. **I gave my home made recipe on my blog,  or packaged if you didn't make mine.**
4-Grinder Rolls ( Hoagie Rolls, Sub Rolls, etc.,.)
8-Slices of American Cheese or Cheese of your choice
Spaghetti Sauce **I gave my home made recipe on my blog. Or use Jar or canned if you didn't make mine.*

Optional Ingredients:
Shredded Lettuce, Sliced Onions, Pickles, Peppers, Black or Green Olives, Grated Parmesan Cheese, etc.,..

Preheat your oven to 375-Degrees Fahrenheit

Directions:
Cut the grinder roll lengthwise down the middle with your sharp knife, open up the roll. Repeat with the other 3-grinder rolls.

Place the split rolls on to your lined baking sheet, side by side. Add 2-slices of cheese to one side of each roll.  Add in the meatballs, depending on the size of your rolls, 4-5 will fit perfectly. Add more if you like.  Ladle the sauce over top of the meatballs, add a little or a lot depending on your preference.


Put lined baking sheet with the grinders in to the oven for 5-7 minutes until the rolls are a light golden brown and the cheese has melted.  Remove and place baking sheet on a heat resistant surface. Add the optional ingredients if you prefer, then serve.

*You can eat them without placing in the oven, just make sure that the meatballs have been warmed, they will melt the cheese.*

Print Friendly and PDF


Home Made Meatballs

I like to make larger batches of meatballs to have on hand for a quick meal, they freeze really well.

What you will need:
1-Large Baking Sheet lined with Aluminum Foil, this if for easy clean up.
1-Medium Size Ice Cream Scoop *Optional*
1-Large Bowl
Measuring Spoons
1-Measuring Cup
1-Large Wooden Spoon *Optional*

Preheat your oven to 375-Degrees Fahrenheit

**Makes about 36-Meatballs**

Ingredients:
1-Large Egg
1-Medium Yellow Onion Peeled and Chopped
1 1/2 Pounds Lean Ground Beef 85%
3/4-Cups Panko Bread Crumbs. *Regular Bread Crumbs are fine.*
1-Teaspoon Dried Basil
1-Tablespoon Granulated Garlic
1-Tablespoon Parmesan Cheese Grated
1-Teaspoon Dried Parsley
3/4-Teaspoon Sea Salt *Regular is fine.*
1/2-Teaspoon Cracked Black Pepper
1/2-Cup Whole Milk


Add all of the above ingredients into your large bowl.  Mix all of the ingredients together until well blended, using your hands works best or use a large wooden spoon which ever you prefer is fine.


Place your lined baking sheet in front of you so you can now start placing the meat mixture onto the tray. Take your ice cream scoop, scoop out the meat mixture.  Squeeze and release the scoop's handle and drop the mixture into your hands.   Roll the meat mixture to form little balls. Place the meat balls onto the lined baking sheet, repeat until you have used up all of the meat mixture.


Place the baking sheet with the meatballs in to your preheated oven and bake uncovered for 45-minutes or until light brown. Make sure that they are thoroughly cooked through by checking one, opening it up, you don't want to see any pink coloring. Once baked, place your baking sheet on to a heat resistant surface and serve.


I used mine for Meatball Grinders, they are also known as Subs, Submarines, Hoagies, etc.,. depending on what area of my country that you reside at.  What you don't use can be stored in an air tight container in the refrigerator for several days or frozen in a Zip Lock Freezer Storage Bag, or a Freezer Safe Container for several months.  I divide the meatballs into individual freezer bags, it's easier that way.  I will post the Meatball Grinder recipe on another page.

Print Friendly and PDF


Sunday, February 7, 2016

Home Made Pumpkin Muffins with Cream Cheese Filling and Vanilla Glaze

You can use the recipe for the pumpkins that I had processed and had pureed in an earlier post. If you didn't process your own pumpkin, you can use all-natural canned pumpkin. Make sure it has no other ingredients listed other than pumpkin.   I did two batches and my family loves these.  I hope you do as well.

**Makes 10-large Pumpkin Muffins**

What you will need:
2- Large Muffin Tins
1-Small Bowl
1- Whisk
Stand or Hand Mixer
Measuring Spoons
1-Measuring Cup
1-Spatula
2-Large Mixing Bowls only if you don't have a stand mixer
Sifter
1-Tablespoon
Tooth Picks
Cooking Spray


Use Organic All Natural ingredients if you can

Dry Ingredients:
1 1/2-Cups of All Purpose Flour *Unbleached is best*
1/2-Cup Whole Wheat Flour
1-Cup Brown Sugar
2-Teaspoons Baking Powder
1/2 Teaspoon Baking Soda
2-Teaspoons Ground Cinnamon
1 Teaspoon Ground Nutmeg
1-Teaspoon Ground Ginger
1-Teaspoon Ground Cloves
1/4 Teaspoon Salt


Wet Ingredients:
3/4 Cups Evaporated Milk
2-Large Eggs
21-Ounces of Pumpkin Puree or 1-15-ounce can plus a 1/2-Cup
1/4 Cup Vegetable Oil
1-Cup Chopped or Crushed Walnuts or Pecans
1 1/2 Teaspoons of Pure Vanilla Extract
2-Tablespoons Pure Maple Syrup


Filling:
1  8-Ounces Package of Cream Cheese
2-Tablespoons Pure Maple Syrup
2-Tablespoons Brown Sugar


Glaze:
1 1/2 Cups Confectioner's Sugar aka: Powdered Sugar
4-Tablespoons Whole Milk
2-Teaspoons Vanilla


Preheat your oven to 400-Degrees Fahrenheit

Lightly spray the inside of your muffin tins with the cooking spray so that the batter won't stick. Set aside.
In a large bowl, combine 1-Cup of brown sugar, baking soda, baking powder, salt, cinnamon, nutmeg, ginger and cloves. Sift in both the wheat and white flours. Mix well and set a side.

In a separate bowl or in a stand mixer add in the eggs, vegetable oil, pumpkin puree, 2-Tablespoons of maple syrup, vanilla extract and evaporated milk. Mix well. Set aside.

Add the dry ingredients into the wet ingredients a little at a time, mix well.  Continue adding wet to dry until all of the dry is completely used. Mix this batter until it becomes smooth. Add in the nuts stirring with the spatula until well combined.  Leave or set aside.


Cream Cheese Filling:
Beat in the bowl that you used for the dry ingredients, the cream cheese, 2-Tablespoons of maple syrup and 2-Tablespoons brown sugar.  Mix well until combined. With the tablespoon gently stir in a little of the cream cheese filling into the pumpkin batter, making a swirling motion. Continue doing this until all of the cream cheese filling is added into the pumpkin batter.  Set aside and make the
glaze.


Glaze:
1 1/2 Cups Confectioner's Sugar aka: Powdered Sugar
4-Tablespoons Whole Milk
2-Teaspoons Pure Vanilla Extract

Put the confectioner's sugar in to the small bowl, slowly add in the milk and vanilla. Whisk gently until smooth and no visible lumps. Set aside.


Now fill your sprayed muffin tins about 3/4 of the way with the combined batters. Bake the muffins in your preheated oven for about 25-30 minutes or until the tooth pick comes out clean. *Poke the muffins with the tooth pick* They should be a light golden brown color.


Once baked and no wet centers, remove from the oven and place on a heat resistant surface.  Drizzle the glaze all over each of the muffins.  Serve warm or have them at a later time.  You can put them on a plate or store in an air tight container. If refrigerated: Warm them in a microwave on high for 15-20 seconds. Enjoy!


Print Friendly and PDF


Home Made Meatless Spaghetti Sauce

I know that I  tend to make large batches of food at times. You can always cut the ingredients in half if you like. I do larger batches because I like to process-can and or freeze them for later use.  As I had mentioned before, by doing this I know what is going in to the food that I make and serve, I don't like artificial colors, preservatives, etc.,.  fresh and home made is always the better choice.   I don't have the exact amount of quarts that this recipe makes, I stored it all in two large freezer safe containers that were sterilized. You can also break it down and store it in individual gallon-size Zip Lock Storage Freezer Bags or quart size sterilized Canning Jars, the choice is yours.  I sometimes share larger batches with friends and family, they really like getting home made from scratch food items.  I also write down and attach the recipe for them to make on their own if they so choose.  I had made this recipe along with processing 2-large pumpkins and pumpkin seeds.  I try to get as much done on a quiet Sunday as I can.


What you will need:
1-large Stock Pot or Water Bath Canner like the one I had used
1-Spatula or large spoon
1-Box or Hand Grater
Measuring Spoons
Sterilized Canning Jars or Freezer safe containers, or Zip Lock freezer bags *Gallon Size*
Funnel for Canning Jars also sterilized
Tasting spoons to taste and adjust the flavors to your liking
Can Opener

Ingredients:
2-Large Carrots finely grated. *Tops and ends removed*
3-28-oz Cans Crushed Tomatoes, organic no salt
3-29-oz Cans Tomato Puree, Organic no salt
2-28-oz Cans whole Plum Tomatoes peeled, organic no salt
2-12-oz or 1-24-oz Can Tomato Paste, organic no salt

2-Tablespoons Dried Parsley
2-Tablespoons Dried Oregano
2-Tablespoons Dried Basil
3-Dried Bay Leaves (whole)
3-Large Yellow Onions Peeled and diced
1 1/2 Cups of water
2-Cups Grated Parmesan Cheese
16-Large White Mushrooms. Washed, sliced, chop stems *Use whatever mushrooms you like*
1-Cup Brown Sugar
1-Garlic Clove Peeled and diced or use the Grater or 2-Tablespoons Granulated Garlic
3/4 Tablespoon Sea Salt *Use whatever salt you like*
3/4 Tablespoons Cracked Black Pepper

Directions:

Put your Stock Pot or Water Canner on top of your stove. Open up and gently remove the lids to all of the tomato cans *Paste, Puree and Crushed* with the exception of the Whole Peeled ones, these you want to leave for last. Pour them all slowly into the large pot or water canner. Using your spatula, scrape the sides of the cans to remove any excess tomato product. Now, take the Whole Peeled Tomatoes and squish them with your hands making larger pieces, which makes for a chunky sauce. Wash and recycle your cans.


Add all of the above ingredients, water, vegetables, spices and herbs into the sauce. Stir the sauce well with your spatula or large spoon to incorporate all ingredients.  Cover your pot or water canner with the lid it comes with leaving a little open space as shown in the photo on the right.


Simmer the sauce on medium high for 30-minutes.  Continue stirring the sauce a few times during the simmering period.  After the 30-minutes, drop the heat down to low and cook the sauce for an additional 4-hours, leaving the lid on leaving a little open space. Stir occasionally during this time, if you find the sauce is sticking to the bottom of the pot, drop the temperature down again a degree or two.  The longer the sauce cooks the richer the flavors become.  Using a tasting spoon, taste to see if the ingredients is to your liking, add more herbs or spices if you choose.  I tend to add a bit more.  I like bold flavors.  **Remove the 3-Bay Leaves and discard.** Once the cook time is complete, serve immediately with whatever sauce dish you choose, ie.,.. pizza, pasta, etc.,..

Once the remaining sauce is cooled, you can store it.  **NOTE: Canning-Processing Spaghetti Sauce... if you don't know how to properly do this procedure, I suggest dividing the remainder of the spaghetti sauce into sterilized freezer safe containers, sterilized canning jars and then freeze them, or pour into zip lock storage freezer bags.  You need to properly store the sauce or it could lead to illness if you don't!  The freezer method is the best way to go.  Leave enough head space - room in the bags, containers or jars for expansion, about a 1/2-inch.  Seal all tightly before freezing.**


Print Friendly and PDF


Monday, February 1, 2016

Roasted Pumpkin Seeds

As you all know I showed you how to process fresh Pumpkins.  I suggested keeping the seeds for roasting and if you have, here is how you go about doing so.  Pumpkins seeds are an extremely healthy snack packed with Zinc, Copper, Protein, Magnesium, and they are an antioxidant, etc.,.  You can eat them as a snack, garish for fruits or vegetables, add them to muffins, cakes or smoothies,  add them in to a Pesto, Pumpkin Brittle, the uses are endless.


Preheat your oven to 300-Degrees Fahrenheit

What you will need:
1-Large Aluminum Foil or Parchment Paper Lined Baking Sheet
1-Medium Size Bowl
1-Sterilized Canning Jar, Zip Lock Bag, or other Storage Container
1-Sterilized Funnel if you have one
1-Colander

Ingredients:
Misto Spray Pump with either Vegetable or Olive Oil inside
*If you don't have one you can just drizzle the oil about 1-Tablespoon*
Seeds from your processed Pumpkin

Optional:
1/3-Cup Sugar
1/4-Teaspoon Salt
1-Teaspoon Ground Cinnamon

Directions:
Line you baking sheet with either Aluminum Foil or Parchment Paper, set a side.

Put a colander in your kitchen sink adding in the Pumpkin Seeds that you just scraped out of your Pumpkin.  Run cool water over the seeds, cleaning and separating them from the slimy stringy pulp. Pick out any pulp left in the colander, I use a bowl and put the pulp in that then set aside. Continue rinsing the seeds until there is no pulp. Shut off the water.   Shake the colander a few times removing excess water. Pick out any seeds that look dehydrated-shriveled and discard them as well as the pulp.


Spray your lined baking sheet with a little bit of the vegetable or olive oil. Make sure to cover the whole baking sheet evenly.  Take the Pumpkin Seeds and lay them in a single layer onto the lined baking sheet.  Now using your Misto Spray Pump, spray a little of the vegetable oil or olive oil over the Pumpkin Seeds making sure they are evenly covered. Don't drown them. If you don't have the Misto, just drizzle the oil evenly over the seeds. Now gently toss the seeds around on the baking sheet, you want to make sure they get a good covering. Place the lined baking sheet into your preheated oven and bake for 45-minutes or until golden brown. **Note: I was multitasking on Sunday and made home made spaghetti sauce, processed the pumpkins and roasted pumpkin seeds.**


While the Pumpkin Seeds are roasting, take your Zip Lock Bag and add in the sugar, salt and ground cinnamon.  Close the bag and shake until well blended.  Set aside. When the seeds are golden brown remove from your oven and place the baking sheet onto a heat resistant surface and let cool for a few minutes until you can safely handle them. They should be warm but not hot.  Put your Pumpkin Seeds in the Zip Lock bag and shake until well coated.


You can keep the Pumpkin Seeds in the Zip Lock bag sealed or transfer them into either the canning jar using the funnel and put the lid and rim on tight or put them in an air tight storage container.  I like using the canning jar myself. You can add other seasonings or spices of your choosing instead of the cinnamon sugar. You can even just have them plain or salted.  Enjoy!

Print Friendly and PDF