Saturday, January 30, 2016

Processing Fresh Pumpkins

Thank you to everyone that is viewing my blog and for all of the lovely messages I have received. Each year my family and I go to one of our favorite local farms in October to pick Pumpkins.  The kids now adults and the two grand kids have so much fun.  The farm takes you out to the fields on a hay ride and drops you off at the edge of their property where you are free to roam and find your special pumpkins and or gourds.  They return to pick you up and continue on giving you a guided tour of the fields which are decorated with both scary and cute Halloween themes.  The farm also sells apples, different varieties of Squashes and Gourds, Apple Cider and all kinds of fall fruits and vegetables.  The corn maze is another thing that we all have a wonderful time going thru, as well as, sitting by their pond next to a bonfire. What a funtastic family day.


Annalise choosing her Pumpkin
Caleb choosing his Pumpkin with Brett in the background 


Once all of the pumpkins are purchased we head back home to clean and carve them for Halloween. I usually purchase a couple extra for myself and set them aside to process and turn them in to quick breads, desserts, waffles, pancakes, smoothies, pasta, etc.,.  The possibilities are endless what you can do with Pumpkins, they aren't just for decorations.

I had two large Pumpkins sitting in my basement since October, my basement is mostly finished but I have an area that we left that isn't, this is where I keep my root vegetables, pantry staples, along with herbs and another refrigerator freezer.  I like having this area because I enjoy processing my own foods, not all but a good deal, and I like to stock up as well and have whatever I need readily available to me. This cuts down on the need to go into town for small shopping trips.

Admittedly processing Pumpkins is a bit time consuming to do, so pick a nice quiet day where you won't be rushing around, I like Sundays best myself.  And now on with how to Process your Pumpkins.

**Preheat your oven to 375-Degrees Fahrenheit**

What you will need:
1-Large Sugar Pumpkin.  I have used the regular Pumpkin without incident.
1-large baking sheet lined with Aluminum Foil, it's less mess doing it this way
1-large bowl for pulp and seeds
1-large bowl for the cooked pumpkin
1-large spoon
1/2-Cup of Vegetable Oil
1-Fork
1-Clean Cotton or Kitchen Towel
Several sterilized Canning Jars or Storage Containers
1-Funnel-Sterilized
Clean Newspapers
Hard work surface like a kitchen or dinning room table works best
1-Colander *Only if roasting the seeds*
1-Emulsion or regular food blender, either one is fine. If you don't have either of those a Potato Masher will do.

Directions:
Spread the newspapers across your table.
Place the bowl on the table.
Place the Pumpkin on the newpapers
Wash the outer skin of the pumpkin with a dampened paper towel or cloth then dry with another paper towel or dish towel.

**I have two large Pumpkins to process but doing one at time.**


Using a sharp knife, cut a circle all around the stem, be careful doing this. Make sure the circle is wide enough to get your hand inside.


Remove the stem and set aside on the newspapers.
Using the large spoon and or your hand, scrape out and remove the stringy pulp and seeds that are inside, put them in the bowl and set aside.  Save the seeds if you want to roast them later on.


Cut the Pumpkin in to quarters (4-Pieces) by using a sharp knife, again be very careful. Remove any
stringy pulp or seeds from the quartered pieces that may be left.  Lay the quarters on the foil lined baking sheet, skin side up.  Put some of the Vegetable Oil on to the palm of your hands and rub the Pumpkin Skins, make sure to completely cover the skins evenly. You don't have to use all of the oil.


Put the baking tray with the pumpkin quarters in to your oven and bake for about 1-hour or until fork tender. Your oven should had already been preheated at 375-Degrees Fahrenheit. *I was making home made Spaghetti Sauce and Roasting the Pumpkin Seeds at the same time I was processing the Pumpkin. I was cooking for 11-hours straight this Sunday, busy...busy...busy.*


**Note: If you are keeping the seeds to roast, take them to your sink and place them in a colander. Run cool water over the seeds and pulp and separate the two. Discard the stringy pulp. Give the colander a few good shakes to remove the excess water.  **Set the colander and seeds aside, I will give the directions on how to roast them on another page.**

Once the hour is up or the Pumpkin quarters are fork tender, remove them from the oven and set aside to cool on a heat resistant surface. Once the Pumpkin is cooled, scoop out the Pumpkin flesh from the skin - shell and place in the large bowl, make sure not to include the skin. If the skin makes its way in to the bowl just take it out and throw it away.


The next step you can either use an Emulsion, regular food blender or potato masher, either one is fine. Blend the Pumpkin until it is pureed with no visible chunks. You want it smooth almost liquefied.


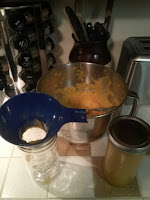
Now put the sterilized funnel inside the mouth - rim of the sterilized canning jar. If you aren't using canning jars, just pour the Pumpkin Puree in to your sterilized storage containers and seal tightly. Don't fill all the way to the top, leave about a 1/2-inch head space from the top leaving room for expansion if you are going to freeze the puree. I will explain that process further down in the instructions.  Pour the puree in to the sterilized canning jars to the *Fill-Line* most jars are marked. If not, the same head space applies as it did for the storage containers, a 1/2 inch.  Put the seal and the lid tightly on the jar, wipe away any excess puree that may have spilled on the jar with your clean cloth, set aside and repeat, filling the other jars or containers.


**Warning!!  This is not Canning - Preserving the pumpkin puree, this is only Cold Processing. Canning - Preserving is a completely different process all together.  Once your jars or containers are filled you can either store them in your refrigerator tightly sealed for 1-week until needed or you can keep them in your freezer tightly sealed safely for 3-months.  This is the two safest ways to do Pumpkins. Please heed this warning because if you don't, you could become very ill.** You can however use the puree immediately if you want to.

What to do with the Pumpkin Puree you may ask.  Quick Breads, Pies, Crumble aka: Crisp, Bread Pudding, Pudding - Custard, Ravioli or Pastas, Smoothies, Pancakes, Waffles, Cinnamon Rolls, the possibilities are near endless.  Happy Eating.

Print Friendly and PDF


Tuesday, January 19, 2016

Home Made Chocolate Cream Pie

You know you're from an Irish family when you hear "Jaysus, Mary and Joseph." I caught myself sounding just like my mother and it scared me.  It's funny the things you swore you wouldn't do when you were a kid, you do as an adult.  I find myself saying a lot of phrases that my parents, grand parents and other relatives use to say and still continue saying. I guess it's ingrained in us if we want it to be or not. I am also hearing my own children and now my grand kids sounding just like me.  It's true about the apple not falling far from the tree. (Smiling).

This is another dessert that is easy to make and it's delicious.  Why use a box when you can make it chemical and preservative free and it's cost effective as well.


What you will need:
9 1/2 Tin or glass pie plate
Medium size sauce pan
Whisk or wooden spoon
Rolling pin
Medium size bowl
Plastic wrap
large zip lock plastic bag


Ingredients for Pudding:
1/4-Cup Semi-Sweet Chocolate Morsels *Optional, I like a more intense chocolate flavor*
1/4 Teaspoons Salt
2 1/4-Cup whole milk
2-Tablespoons Butter not margarine
2/3-Cup of sugar
1/4-Cup Unsweetened Cocoa Powder
3-Tablespoons Corn Starch
1-Teaspoon Pure Vanilla Extract


Preheat your oven to 375-Degrees Fahrenheit

Ingredients for Graham Cracker Pie Crust:
6-Tablespoons melted butter
2-Tablespoons sugar
1-Package-sleeve of Graham Crackers, about 11-sheets total.


Directions for Graham Cracker Pie Crust:
Put the Graham Crackers in to a zip lock plastic bag. Seal the bag shut, now roll the rolling pin over the Graham Crackers numerous times until they are crushed and look like small bits of sand.  You can pound the bag with the rolling pin if you are having a bad day. (Smiling)  Take the now Graham Cracker Crumbs out of the zip lock bag and place in to the medium size bowl.  Add in the melted butter and sugar, mix well.  Now put the Graham Cracker mixture in to your pie plate.  Using your hands, spread the Graham Cracker crumbs all over the bottom of the pie plate and then using your fingers, press the mixture firmly up the sides of the plate, try to make this as even as you can, it doesn't have to be perfect.  Tad-ah!  You now have made a pie crust.  Place the crust in to the oven for 15-minutes or until golden brown. Keep an eye on this!  After 15-minutes remove from the oven and set aside on a heat proof surface.


Directions for Chocolate Pudding:
In the sauce pan add sugar, cornstarch, salt and cocoa powder.  Place the sauce pan on your front burner and turn it on medium heat.  Now slowly add in the milk and begin to stir all ingredients together.  Keep stirring constantly, you don't want the mixture to stick or burn on the bottom of the pan. Bring this mixture to a boil for about a minute, continually stirring.  Remove the sauce pan from the burner and add in the vanilla extract and butter.  Stir a few more times to make sure everything is blended well.   Now pour the chocolate pudding in to your pie shell. Cover the pie with plastic wrap, this will help prevent getting a skin of chocolate on top.  Refrigerate for at least and hour. Once cooled top with whipped cream and chocolate shavings or chocolate morsels, optional. Enjoy!

Note:
**I don't have step-by-step photos, I lost them when my computer crashed.  Here is one that I had made for Thanksgiving last year. It was a big hit. The Turkeys and  Home Made Whipped Cream directions are here on my blog. This Chocolate Cream Pie I made with a Pastry Crust.**


Print Friendly and PDF


Monday, January 18, 2016

Chocolate Banana Smoothie

This is very healthy as well as satisfying and has less calories than ice cream and it's all natural.

What you will need:
Blender or Ninja Mixer *I use both*
Glass or Drinking Cup
Straw *Optional*

What You Will Need:
Measuring Spoons
Measuring Cup
Blender or Ninja

Ingredients:
1-Banana medium frozen
1-Tablespoon Unsweetened Cocoa Powder
2-Tablespoons PB2 (Powdered Peanut Butter) less calories than regular peanut butter.
1-Cup of Unsweetened Vanilla Almond Milk *Unflavored is fine as well*
1/3-Crushed Ice *Optional, the ice makes it thicker like ice cream*
2-Tablespoons Whipped Cream *Optional*

Directions:
Add the frozen banana and the other ingredients in to your Ninja or Blender.  Mix well.  Put into a drinking cup or glass.  Add the whipped cream on top. Put in the straw and enjoy!

My recipe has 190-calories with 2-Tablespoons of Whipped Cream, at 2 3/4-Cups. Not too bad compared to 1/2-Cup of ice cream which has at least 150-calories or more depending on the flavor and contents. Note:  If you change my original ingredients the calories will increase.

You can substitute the PB2 for regular peanut butter or even Hazelnut Chocolate Spread, you know the name brand I mean. Wink...wink. Decrease or increase the ingredients to your personal taste. 


Print Friendly and PDF


Whipping Cream As A Dessert Topping

What you will need:
Hand or stand mixer. *If using a stand mixer use the whisk attachment.*
Medium Bowl
Plastic Wrap

Ingredients:

1-16 Ounce carton of Whipping Cream
1-Tablespoon Pure Vanilla Extract *Any flavored extract can be used*
3/4-Cup Confectioners Sugar (Powdered)
1-Tablespoon Sugar

Open and pour the Whipping Cream either in to your stand mixer's bowl or a medium bowl.  Start to whip the cream on medium, do this for about a minute.  Stop the hand or stand mixer.  Add in the remaining ingredients.  Put the mixer on high and beat for about 5-minutes or until the whipped Cream has thickened with peaks. Don't over mix or you will get butter! Transfer the Whipped Cream to the medium bowl and cover tightly with plastic wrap.  Put in the refrigerator until serving.  Top any dessert or you can top Hot Chocolate as well. This can be frozen in a freezer safe container.  If you want to get fancy, put the whipped cream into a piping bag and use a decorator tip.  If after a day the whipped cream loosens, just re-whip with your mixer.


Print Friendly and PDF


Garlic Butter Dinner Rolls

80% of the time I cook and bake from scratch.  Every once in a while I will cheat, although not that often with prepared foods. I always read the labels to make sure that they are Organic with no preservatives.   I paired these dinner rolls with my White Vegetable Lasagna with Sausage and Vegetables along with a Mixed Green Salad. Both recipes are now on my blog.


Preheat your oven to 350-Degrees Fahrenheit

What you will need:
Parchment Paper
Baking Sheet
1-Medium size bowl
Pastry Brush

Ingredients:
12-Frozen Dinner Rolls *Organic-no preservatives*
4-Tablespoons of melted butter (20-30 seconds on high in the microwave)
1-Teaspoon Dried Parsley
2-Teaspoons Granulated Garlic

Place the frozen dinner rolls on the parchment lined baking sheet.  Spread them out so they are not touching one another.

Add all of the ingredients together into your bowl, stir well.   Stick your brush into the butter mixture and spread the mixture on top and the sides of the dinner rolls.  Place the dinner rolls in to the oven for about 10-15 minutes or until lightly browned. You can also follow the instructions on the package for heating. Remove from the oven and promptly serve while hot. I usually make extra of the garlic butter mixture, split  open the roll and add more to the inside.


                                                           Before going in to the oven.

Print Friendly and PDF


White Lasagna with Sausage and Vegetables

Admittedly this Lasagna dish is a bit time consuming but well worth the effort it will take you.  You can change out the Sausage for Ground Beef, Turkey Sausage, etc., or don't add any meat at all.

What you will need:
Large Square Pan 9x16  *None reactive metal.  Glass is also good.*
Large Sauce Pan
Frying Pan *I use a heavy Cast Iron Skillet*
Large 5-Quart Pot
Baking Sheet lined with Parchment Paper or Aluminum Foil, optional
Whisk or wooden spoon
2-clean tasting spoons (Regular teaspoons)
Colander
Pot holders or Oven Mitts

Preheat your oven to 350-Degrees Fahrenheit

Ingredients for the White Cheese Sauce:
4-Tbls Butter
7-Tbls All Purpose Flour
7-Cups of Whole Milk
1 1/4 Cups Grated Parmesan Cheese
1-Tsp Ground Nutmeg
Salt and Pepper to taste


Ingredients for the Meat Mixture:
1-Pound Sweet or Spicy Sausage ground
8-Brown and Serve Links Sliced
9-Large Snow White Mushrooms sliced
Salt and Pepper to taste
1-Tablespoons Dried Basil
1-Tablespoons Granulated Garlic
1-Large Yellow Onion peeled


Ingredients for the Cheese Filling:
32-Oz Ricotta Cheese *Whole Milk*
2-Large Eggs
1-Cup Grated Parmesan Cheese

Vegetables:
16-Ounces Yellow Squash Frozen
16-Ounces Zucchini Frozen


Ingredients for layering:
1 32-Ounce bag of Shredded Mozzarella Cheese or *Grate your own*
2-Tbls Dried Parsley for sprinkling over finished Lasagna
1 16-Ounce Package of Lasagna Pasta Noodles


Lasagna Noodles:
Fill your Large Pot 3/4 of the way up with water, add 3-Tbls salt.  You want enough salt in the water to season your Lasagna Noodles. This is the only chance you get to season them. Bring the pot of water to a rolling boil, add in the whole package of Lasagna Noodles.  Stir the noodles the first minute or two of cooking, this will help prevent them from sticking to one another.  Boil Lasagna uncovered for about 8-9 minutes. Place a colander in your kitchen sink.  Remove the pot off of the burner with either your pot holders or oven mitts, be extremely careful this is very hot!  Drain the pasta and water in to the colander. Shake a few times to remove excess water.  Set colander aside. *Reuse this pot for your vegetables.*


White Cheese Sauce:
Using your large sauce pan put in the butter.  Set your burner on medium low heat.  Melt the butter, when fully melted add in the flour, stir with either your whisk or wooden spoon. Mix well for about 2-3 minutes this is a Rue. Add your milk to this mixture and bring it to a boil, continue stirring this mixture which is a Bachamel Sauce. Once the mixture boils, reduce your burner temperature to low and continue to stir the Bachamel Sauce.  Do this for about a minute or two.  Now remove the large sauce pan off of the burner.  Add in the Grated Parmesan Cheese, stir well making sure it is thoroughly blended. Add in your salt and pepper. Using a clean tasting spoon to see if the mixture needs more salt and pepper or not.  Set aside.


Meat Mixture:
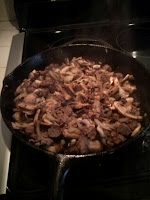
Set your largest burner on medium high heat.  Place your large skillet or frying pan on top of the burner.  Add in the sausages and cook until slightly browned, 4-5 minutes.  Add all of the ingredients for the meat mixture.  Stir well so all ingredients are blended.  Cook until mushrooms are a light golden brown and the onions are a light translucent brown.  Take off of the heat and set aside.


Vegetables:
Fill the pot that you  used to cook the lasagna noodles 3/4 of the way up with water. Salt the water, this time only using 1-tsp of salt. Add both bags of the vegetables and bring to a rolling boil for about 5-6 minutes or until vegetables are fork tender.  Drain Vegetables and set aside.


Cheese Filling:
In a medium sized mixing bowl or use your stand mixer, add in the Ricotta Cheese, 2-large eggs and Grated Parmesan cheese.  Mix well until smooth, set aside.


Layering the Lasagna in your square pan:
Spread a thin layer of the White Cheese Sauce on the bottom of the pan, make sure it's completely coated.  Lay down 4-Lasagna noodle strips side by side across the pan, you may have to lay one down crosswise at each end making sure the pan is covered with the lasagna noodles. Now add about a cup or so of the Cheese Filling on top of the Lasagna noodles, spread this out covering all of the lasagna.


Now put down a layer of the vegetables, I alternate yellow and green.


Now add the Meat Mixture on top of the vegetables. Cover evenly.


Sprinkle Mozzarella Cheese evenly over top of the Meat Mixture.


Repeat the layering process.  White Cheese Sauce, Lasagna Noodles, Cheese Filling, Vegetables, Meat Mixture, Mozzarella Cheese. Sprinkle Dried Parsley on top.  Once all of the ingredients are used up, place the square pan on a parchment or aluminum foil lined baking sheet. This helps for easy clean up if the lasagna should happen to boil over, it won't make a mess of your oven.  Now put the lasagna pan and baking sheet in to the oven, this is heavy so be careful.


Bake for 30-minutes uncovered and 30-minutes covered with aluminum foil.   Cheese should be browned when finished.  Take Lasagna out of the oven and set on top of your stove. Let the lasagna sit for about 15-minutes to set up.  Cut in to squares and serve.   Enjoy!


Serving suggestion:
Mixed Greens Salad, recipe is here on my blog.  Garlic Butter Dinner Rolls.


Print Friendly and PDF


Mixed Green Salad

You will need a large bowl for the salad, tongs or large fork and Spoon for tossing.

What You Will Need:
Large Salad Bowl
Salad Tongs or Large Spoon and Fork
Salad Spinner if you have one
Paper Towel
Knife

1-Cup Baby Spinach
1-Cup Red Romaine Lettuce
1-Cup Radicchio 
1-Cup Beet Greens
1-Cup Kale
1-Cup Green or Swiss Chard
1-Medium Red Onion
1-Large Ripe Red Tomato 

Wash all of your greens and tomato thoroughly, dry using a salad spinner or lay on paper towels and blot.  Cut up the onion and tomato any way you like. Add all ingredients in the large bowl and toss with tongs until completely mixed.  Tomato are heavy so they do tend to settle at the bottom of the bowl. 


Use your favorite salad dressing or vinegar and oil drizzled over mixed greens and serve.

Print Friendly and PDF


Sunday, January 17, 2016

Apple Crisp AKA: Apple Crumble

I am lucky enough to have several apple and fruit orchards, farms and farmer's markets in and around the area in which I live.  I always try to support farmers and agricultural based businesses.  I like the fact that the foods are fresh as well as organic which is much better for you.  This is a fairly uncomplicated dessert to make

Preparation time: 25-minutes
Bake Time: 30-minutes

What you will need:
Casserole or glass baking dish
Medium size bowl
Parchment Paper or Aluminum Foil
Baking Sheet

Ingredients:
13-Medium Sized Cooking Apples. *I like McIntosh or Granny Smith*

Topping:
1 1/2 Cups Packed Brown Sugar *Light or Dark is fine. Dark has more Molasses in it.*
1-Cup All Purpose Flour
1-Cup of Old Fashioned Oats
2/3 Cup Butter softened
1 1/2 Teaspoons Ground Cinnamon
1 1/2 Teaspoons Ground Nutmeg

Preheat your oven to 375-degrees Fahrenheit

Rub butter on the bottom and along the 4-sides of you baking or casserole dish, then set aside.  Peel and core all of the apples.  I like to use and apple cutter-corer, it makes it so much easier. Put all of the peeled and cored apples into the buttered baking or casserole dish, spread them evenly. Set aside. *The apples may turn a little brown this is fine, it's from them sitting out in the air.  You won't notice once they are baked.*


Mix in a bowl or stand mixer the 6-topping ingredients until all are well blended.  You will have lumps - crumbles, that's what you want.  I like to squeeze the combined topping ingredients with my hand to insure the mixture does have lots of lumps -crumbles, that's just me you don't have to.  Now sprinkle the topping on top of  all of the apples.  Make sure that the apples are evenly covered with the topping.


Bake the apples for about 30-40 minutes or until fork tender and the topping is a golden brown.


*I like to line a baking sheet with either Parchment Paper or Aluminum Foil and place the casserole or baking dish on top, this way if it does bubble over a little bit, it's contained on the baking sheet and you don't have a mess in your oven.*

Serve warm with clotted cream, whipped cream or ice cream. *Whipping Cream As A Dessert Topping" is also listed here on my blog.  Enjoy!


Print Friendly and PDF